
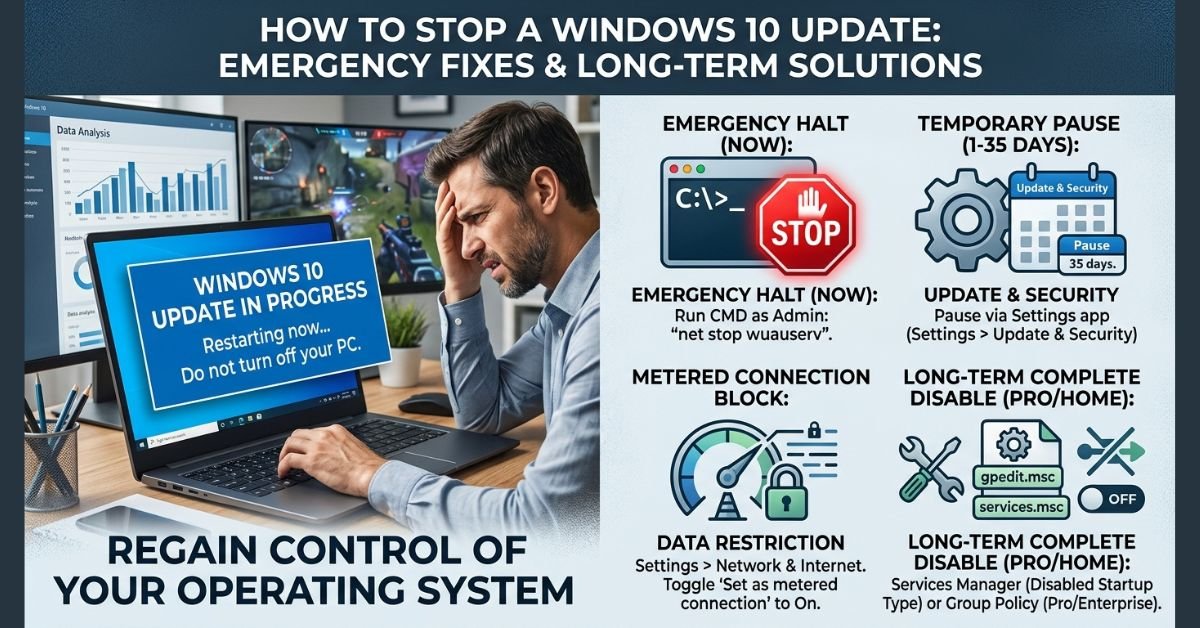
We have all been there: you are in the middle of a critical work presentation, rendering a video, or playing a competitive online match when Windows 10 decides it is time to force a system restart. Even worse, a background download might start hogging your internet bandwidth right when you need a smooth connection.
While Microsoft designs Windows 10 updates to patch security vulnerabilities and deliver system enhancements, automatic updates often interrupt daily workflows or introduce unexpected system bugs.
Whether an update is actively downloading right now, or you want to prevent Windows 10 from updating automatically in the future, this guide walks through the exact, step-by-step methods to regain complete control over your operating system.
Quick Decision Matrix: Which Method Should You Use?
Before diving into the steps, use this table to choose the best method for your immediate situation:
| Situation / Objective | Recommended Method | Skill Level Required | Duration / Impact |
| Update is downloading/installing right now | Command Prompt (Net Stop) | Intermediate | Immediate halt |
| Want a temporary break (1 to 35 days) | Windows Settings Pause | Beginner | Up to 35 days max |
| Stop updates on Wi-Fi or Ethernet | Set Metered Connection | Beginner | Persistent on selected network |
| Long-term complete block (Windows Pro/Enterprise) | Group Policy Editor (gpedit.msc) | Intermediate | Permanent until re-enabled |
| Long-term complete block (Windows Home) | Services Manager (services.msc) / Registry | Advanced | Semi-permanent (may reset after major upgrades) |
Method 1: How to Stop an In-Progress Windows Update Immediately
If Windows 10 is actively downloading or applying an update in the background and slowing down your PC, you do not have time to navigate through multiple menu layers. The fastest way to kill the update process without causing system file corruption is through the Command Prompt.
Step-by-Step Instructions:
- Click the Start menu or press the Windows key, type
cmd, right-click on Command Prompt, and select Run as administrator. - In the Command Prompt window, type the following command and press Enter:DOS
net stop wuauservThis command halts the primary Windows Update service immediately. - Next, type the following command and press Enter:DOS
net stop bitsThis stops the Background Intelligent Transfer Service (BITS), which handles background downloads. - To ensure background update installations are halted, run these additional commands, pressing Enter after each:DOS
net stop dosvc net stop cryptsvc
1.Open File Explorer:Prerequisite: Ensure Windows Update services are stopped first.
Press Windows Key + E to launch File Explorer on your desktop.
2.Navigate to SoftwareDistribution Folder:Location of downloaded update files.
Copy and paste the following path into your File Explorer address bar and press Enter:
C:\Windows\SoftwareDistribution\Download
3.Delete Temporary Update Files:Frees up disk space and prevents corrupt installations.
Select all files inside the Download folder (Ctrl + A), right-click, and select Delete.
(Note: Do not delete the main SoftwareDistribution folder itself—only delete the items inside the Download folder.)
Method 2: Pause Windows 10 Updates via Settings (Temporary Fix)
If you simply need a few weeks of uninterrupted work time without modifying system services, Microsoft provides a native feature to pause automatic updates for up to 35 days.
[Start] ➔ [Settings] ➔ [Update & Security] ➔ [Windows Update] ➔ [Advanced Options] ➔ [Pause Updates]
How to configure it:
- Press Windows Key + I to open the Settings app.
- Click on Update & Security.
- On the Windows Update tab, click Pause updates for 7 days.
- To pause updates for longer, click Advanced options.
- Scroll down to the Pause updates section, click the dropdown menu, and choose a date up to 35 days in the future.
Note: Once your 35-day pause period expires, Windows 10 will require your system to download and install all pending updates before you can pause them again.
Method 3: Block Updates Using a Metered Connection
Windows 10 automatically defers major software updates on connections flagged as “metered” to protect users from data overage charges. By tricking Windows into believing your Wi-Fi or Ethernet connection has a data cap, you can prevent automatic background update downloads.
Setting Wi-Fi as Metered:
- Open Settings (
Windows Key + I) and click Network & Internet. - Select Wi-Fi from the left panel, then click on your active Wi-Fi network.
- Toggle the Set as metered connection switch to On.
Setting Ethernet (Cable) as Metered:
- Open Settings and select Network & Internet.
- Click Ethernet in the left menu, then click your connected network name.
- Toggle Set as metered connection to On.
Method 4: Disable Windows Update Service Permanently (services.msc)
For users on Windows 10 Home or Pro who want to stop automatic background checks entirely, disabling the underlying Windows Update service offers a straightforward solution.
Run (Win+R) ➔ services.msc ➔ Windows Update ➔ Startup Type: Disabled ➔ Stop Service
Detailed Steps:
- Press Windows Key + R to launch the Run dialog box.
- Type
services.mscand click OK. - Scroll down the alphabetical list to find Windows Update.
- Right-click Windows Update and choose Properties.
- In the General tab, change the Startup type dropdown menu from Automatic to Disabled.
- Under Service status, click the Stop button to end the active process immediately.
- Click Apply, then OK.
+-------------------------------------------------------------+
| Windows Update Properties (Local Computer)              [X] |
+-------------------------------------------------------------+
| General | Log On | Recovery | Dependencies |                |
|                                                             |
| Service name: wuauserv                                      |
| Display name: Windows Update                                |
|                                                             |
| Startup type:  [ Disabled                 v ]  <-- CHANGE   |
|                                                             |
| Service status: Stopped                                     |
|                [ Start ]  [ Stop ] <-- CLICK                |
+-------------------------------------------------------------+
To reverse this setting in the future, repeat these steps, change the Startup type back to Automatic, and click Start.
Method 5: Disable Automatic Updates via Local Group Policy Editor (Windows 10 Pro & Enterprise)
If you use Windows 10 Pro, Enterprise, or Education, the Local Group Policy Editor provides the most robust method for controlling update behavior without completely breaking system components.
1.Launch Group Policy Editor:Requires administrative rights.
Press Windows Key + R, type gpedit.msc, and press Enter.
2.Navigate to Windows Update Folder:Locate the update administrative templates.
In the left pane, navigate along this exact path:
Computer Configuration > Administrative Templates > Windows Components > Windows Update.
3.Modify Configure Automatic Updates Policy:Change default updating behavior.
In the right pane, double-click Configure Automatic Updates.
Select Disabled on the top-left options panel to completely block updates, OR select Enabled and choose 2 – Notify for download and notify for install from the dropdown menu to receive prompts before downloads occur.
4.Save and Apply Changes:Finalize system changes.
Click Apply, then click OK to save your configurations.
Method 6: Registry Hack to Block Windows 10 Updates (Windows Home Edition)
Since Windows 10 Home lacks the Local Group Policy Editor, Home edition users can create a custom registry key to achieve identical results.
Warning: Editing the Windows Registry carries inherent risks. Always back up your registry (
File > Export) before making edits.
How to apply the registry tweak:
- Press Windows Key + R, type
regedit, and press Enter. - Navigate to the following path in the Registry address bar:
HKEY_LOCAL_MACHINE\SOFTWARE\Policies\Microsoft\Windows - Right-click the Windows folder, select New > Key, and name it
WindowsUpdate. - Right-click the newly created
WindowsUpdatekey, select New > Key, and name itAU. - Click on the AU key. In the right pane, right-click empty space, choose New > DWORD (32-bit) Value, and name it
NoAutoUpdate. - Double-click
NoAutoUpdate, change its Value data to1, and click OK. - Restart your computer to apply the policy.
Security Best Practices: What You Need to Know
While stopping automatic Windows 10 updates provides immediate peace of mind, running an unpatched operating system long-term poses significant digital risks.
                    +-----------------------------+
                    |  Disable Automatic Updates  |
                    +--------------+--------------+
                                   |
           +-----------------------+-----------------------+
           |                                               |
           v                                               v
+-----------------------+                       +-----------------------+
|  RISKS                |                       |  MITIGATIONS          |
|  * Zero-day exploits  |                       |  * Schedule updates   |
|  * Unpatched bugs     |                       |    manually monthly   |
|  * Driver glitches    |                       |  * Use active third-  |
|                       |                       |    party antivirus    |
+-----------------------+                       +-----------------------+
Key Security Recommendations:
- Schedule Monthly Audits: Set a calendar reminder every second Tuesday of the month (Microsoft Patch Tuesday) to manually turn updates back on, install security patches, and re-disable auto-updates.
- Keep Security Features Active: Disabling Windows Update does not automatically turn off Microsoft Defender Antivirus, but staying up to date ensures your threat definition database remains current.
- Backup Critical Work: Always create a System Restore Point before manually installing batch updates so you can quickly roll back if a patch causes stability issues.
Frequently Asked Questions (FAQs)
How do I stop a Windows 10 update that is stuck at 99%?
If an update gets stuck downloading or installing, open Command Prompt as administrator and run net stop wuauserv followed by net stop bits. Next, navigate to C:\Windows\SoftwareDistribution\Download and clear all temporary files inside that directory. Re-enable the service by typing net start wuauserv to reset the update engine.
Will stopping updates slow down my PC?
No, stopping updates will not slow down your PC performance. In fact, stopping background update downloads often frees up system RAM, disk usage, and CPU cycles on older hardware. However, missing out on performance optimizations or driver bug fixes over time could affect overall system stability.
Can I stop specific updates while allowing security patches?
Yes. If a driver update or non-essential feature update is causing system crashes, Microsoft offers an official tool called the Show or hide updates troubleshooter (wushowhide.diagcab). Running this utility allows you to selectively hide specific problematic updates while allowing standard security patches to download normally.
Conclusion
Automatic updates in Windows 10 are designed to keep your machine safe, but they shouldn’t interfere with your work or slow down your internet speed.
For immediate issues, use the Command Prompt commands to instantly halt an active download. If you just need a brief break, use the built-in Pause Updates feature. For long-term control, options like Metered Connections, Services Manager, or Group Policy adjustments put you back in charge of your operating system.
- Microsoft Official Support: Manage Windows 10 Updates and Policies/What is Windows 365? Complete Cloud PC Guide
