Your computer feels sluggish, or you’re about to buy new memory sticks, and suddenly you need to know one thing: how fast is your RAM actually running? It’s a more common question than most people realize, and the answer isn’t always as simple as looking at a sticker.
RAM speed affects everything from gaming frame rates to how quickly your video editor renders a timeline. If you don’t know your current speed, you can’t diagnose bottlenecks, verify you’re getting what you paid for, or safely add more memory later.
This guide covers every method that actually works in 2026 built-in tools, third-party software, and even how to read the physical RAM stick if software fails you.
Why RAM Speed Actually Matters
RAM speed determines how quickly your processor can read and write short-term data. It’s measured in MHz or MT/s (megatransfers per second), and higher numbers generally mean faster data transfer between your CPU and memory.
Here’s the part most articles skip: RAM speed only matters within the context of what your system can use. A blazing-fast 6000MHz kit sitting in a motherboard that only supports 3200MHz is throttled down automatically. You paid for speed you can’t access.
This is why checking your actual running speed, not just the speed printed on the RAM stick’s label is the real task here. The two numbers frequently don’t match.
Three scenarios where this check becomes essential:
- Your PC feels slow and you suspect RAM isn’t running at its rated speed (common after a fresh build or BIOS reset)
- You’re troubleshooting crashes or blue screens that might trace back to memory instability
- You’re buying additional RAM and need to match your existing sticks exactly
Quick Answer: The Fastest Way to Check RAM Speed
If you’re in a hurry, here’s the fastest route on each platform.
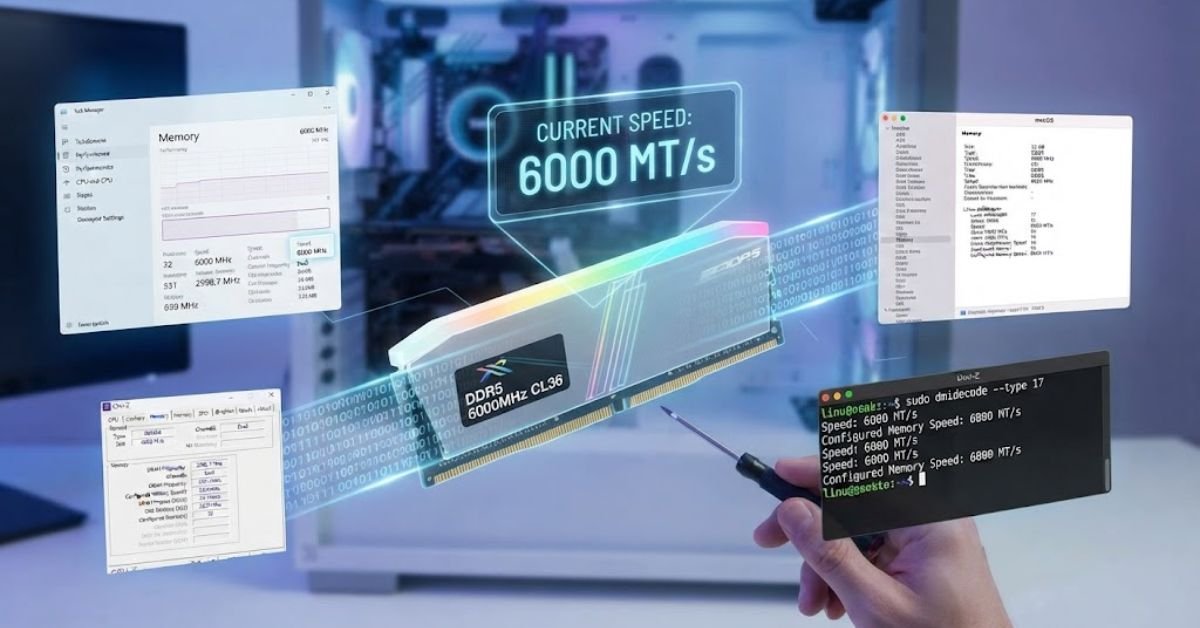
On Windows: Open Task Manager (Ctrl+Shift+Esc), click the Performance tab, select Memory. Your speed shows in MHz on the right side.
On Mac: Click the Apple menu, select “About This Mac,” then “More Info” or “System Report.” Look under Memory.
On Linux: Open a terminal and run sudo dmidecode –type 17.
For most people, this is enough. But Task Manager’s number can be misleading in specific situations, which we’ll get into below.
Method 1: Check RAM Speed Using Task Manager (Windows)
Task Manager is built into every copy of Windows, so it’s the first stop for most users.
Follow these steps:
- Press Ctrl + Shift + Esc to open Task Manager directly
- Click the Performance tab at the top
- Select Memory from the left sidebar
- Look at the Speed field in the lower-right panel this is your current RAM speed in MHz
This method works well for a quick check, but it has a real limitation worth knowing about.
The catch: Task Manager sometimes reports the JEDEC standard speed rather than the XMP/DOCP-enabled speed, especially if you haven’t enabled your RAM’s rated overclock profile in the BIOS. This means your RAM might actually be capable of running faster than what Task Manager shows.
If your RAM is rated for 3600MHz but Task Manager shows 2133MHz or 2400MHz, don’t panic this almost always means XMP (Intel) or DOCP/EXPO (AMD) simply isn’t enabled in your BIOS, not that your hardware is defective.
Method 2: Use the System Information Tool (Windows)
This built-in utility gives more detail than Task Manager in some cases, though the interface feels dated.
Steps:
- Press Windows key + R to open the Run dialog
- Type msinfo32 and press Enter
- In System Summary, look for Installed Physical Memory and related entries
System Information is less reliable for speed specifically and works better for confirming total capacity. For speed accuracy, Task Manager or third-party tools do a better job.
Method 3: Command Prompt or PowerShell (Windows)
For users comfortable with a command line, this method pulls data directly from Windows Management Instrumentation (WMI) and tends to be accurate.
Using Command Prompt:
- Search “cmd” in the Start menu, right-click, and select Run as administrator
- Type this command and press Enter:
wmic memorychip get speed
This returns the rated speed of each RAM stick installed, listed individually if you have multiple modules.
Using PowerShell (recommended for Windows 11):
Get-CimInstance -ClassName Win32_PhysicalMemory | Select-Object Speed, Manufacturer, Capacity
This gives you speed, manufacturer, and capacity per stick in a clean table format genuinely one of the most useful one-line checks available.
A word of caution: these commands report the RAM module’s rated speed capability, not necessarily what it’s currently running at. Cross-reference with Task Manager or CPU-Z for the actual operating speed.
Method 4: Third-Party Tools (Most Accurate)
Built-in Windows tools are convenient, but dedicated diagnostic software gives you the clearest, most trustworthy picture especially for troubleshooting or verifying overclocks.
CPU-Z (Free, Industry Standard)
CPU-Z has been the go-to tool for hardware diagnostics for over two decades, and it remains the most trusted free option.
How to use it:
- Download CPU-Z from the official CPUID website
- Install and open the program
- Click the Memory tab
- Check the DRAM Frequency field multiply this number by 2 to get your effective transfer speed (this trips up a lot of people)
Why the multiplication matters: RAM is double data rate (DDR), meaning it transfers data twice per clock cycle. CPU-Z shows the base frequency, so a reading of 1600MHz actually means your RAM is running at DDR4-3200 speeds. This confuses almost everyone the first time they see it.
The SPD tab in CPU-Z is equally valuable; it shows the rated speeds your RAM is capable of at different voltage profiles, letting you compare “what it’s doing” versus “what it can do.”
HWiNFO (Free, More Detailed)
HWiNFO gives deeper sensor data and is favored by overclockers and system builders who want granular control.
It reports real-time memory clock, timings (CL, tRCD, tRP, tRAS), and voltage all in one panel, making it easier to spot instability issues that a simple speed check won’t reveal.
Comparison Table: Windows RAM-Checking Methods
| Method | Accuracy | Beginner-Friendly | Shows Timings | Cost |
| Task Manager | Moderate | Yes | No | Free (built-in) |
| PowerShell/CMD | Good (rated speed) | Moderate | No | Free (built-in) |
| CPU-Z | Excellent | Yes | Yes | Free |
| HWiNFO | Excellent | Moderate | Yes, detailed | Free |
| Physical inspection | Perfect (rated) | Moderate | Sometimes | Free |
How to Check RAM Speed on Mac
Mac users have fewer built-in options, but the process is straightforward.
Using About This Mac:
- Click the Apple menu in the top-left corner
- Select About This Mac
- Click More Info, then System Report (or just Memory, depending on macOS version)
- Under the Memory section, look for Speed listed in MHz
Important context for Apple Silicon users: If you’re on an M1, M2, M3, or M4 Mac, this section looks different because RAM is unified memory soldered directly to the chip. There’s no upgrade path, and speed is fixed by Apple at the hardware level checking it is purely informational at that point, since you can’t change or upgrade it.
For Intel-based Macs (older models), the memory is typically upgradeable and this check remains genuinely useful before buying replacement modules.
How to Check RAM Speed on Linux
Linux users get some of the most detailed information available, straight from the terminal.
Run this command:
sudo dmidecode –type 17
This pulls SMBIOS data directly and displays configured speed, maximum rated speed, manufacturer, and part number for each installed module.
Alternative for a quicker glance:
sudo lshw -C memory
This gives a more readable summary if dmidecode’s output feels overwhelming.
Physical Inspection: Reading the RAM Stick Label
When software checks feel inconsistent or you’re troubleshooting a system that won’t boot into an OS, reading the RAM stick itself settles any doubt.
What to look for on the label:
Most RAM sticks print a code like PC4-25600 or DDR4-3200. The number after “DDR” is the actual data rate in MT/s this is the number you’ll see advertised (3200MHz, 3600MHz, etc.).
The “PC” number represents theoretical bandwidth in MB/s and is less commonly referenced in everyday shopping or troubleshooting.
Steps to physically check:
- Power down the computer completely and unplug it
- Ground yourself by touching a metal surface to avoid static damage
- Open the case and locate the RAM slots
- Gently remove one module and read the sticker (most manufacturers print speed clearly)
- Reinstall carefully, making sure it clicks fully into place
This method is slower but eliminates any software reporting quirks. It’s especially useful for diagnosing a PC that won’t display anything on screen a classic sign of an improperly seated or failing RAM module.
Troubleshooting: When Your RAM Isn’t Running at Its Rated Speed
This is the scenario that brings most people to this article in the first place: your RAM should be running at, say, 3600MHz, but every tool shows 2133MHz or 2400MHz instead.
Common causes and fixes:
- XMP/DOCP/EXPO isn’t enabled Enter your BIOS (usually Delete or F2 at boot), find the memory or overclocking section, and enable your XMP profile (Intel) or DOCP/EXPO profile (AMD). This alone fixes the issue in the vast majority of cases.
- Motherboard doesn’t support the rated speed Check your motherboard’s QVL (Qualified Vendor List) on the manufacturer’s website to confirm your specific RAM kit is supported at full speed.
- CPU memory controller limitation Some CPUs, particularly budget or older models, cap the maximum supported memory speed regardless of what the RAM or motherboard can handle.
- Mixed RAM kits Installing sticks from different kits or with mismatched speeds often forces everything down to the slowest module’s rating.
- Outdated BIOS Manufacturers frequently release BIOS updates specifically to improve memory compatibility and stability at higher speeds.
Quick diagnostic checklist:
- Confirm RAM’s rated speed on the manufacturer’s product page or box
- Check current running speed with Task Manager or CPU-Z
- Enter BIOS and verify XMP/DOCP/EXPO status
- Confirm motherboard QVL compatibility
- Update BIOS to the latest stable version if available
- Test one stick at a time if speed still looks wrong (isolates a faulty module)
RAM Speed vs. RAM Timings: What Else You Should Check
Speed tells only part of the story. RAM timings (often written as something like 16-18-18-38) measure latency how many clock cycles it takes for the memory to respond to a request.
Lower timings mean lower latency, which can matter as much as raw speed for certain workloads, especially gaming. A 3200MHz kit with tight timings can occasionally outperform a 3600MHz kit with loose timings in latency-sensitive tasks.
CPU-Z and HWiNFO both display timings alongside speed, so it’s worth glancing at both numbers rather than fixating on MHz alone.
Frequently Asked Questions
Is 3200 MT/s the same as 3200MHz?
Not technically, but they’re used interchangeably. MT/s (megatransfers per second) is the accurate term for DDR RAM since it transfers data twice per clock cycle. The actual clock speed is half — so “3200MHz RAM” really runs at a 1600MHz clock but transfers at 3200 MT/s.
What does 40-40-40-77 mean in RAM?
Those are CAS latency timings (CL-tRCD-tRP-tRAS) — the number of clock cycles RAM takes to respond to specific commands. Lower numbers mean lower latency and snappier response times. 40-40-40-77 is fairly loose (slow) compared to tighter kits like 16-18-18-38.
How do I know if my RAM is 3200MHz?
Check Task Manager (Windows) → Performance → Memory, or use CPU-Z’s Memory tab and double the “DRAM Frequency” number shown. If it reads lower than 3200, enable XMP/DOCP/EXPO in your BIOS.
Is 37% memory usage high?
No — that’s healthy, normal usage. Windows and Mac both use available RAM for caching to speed things up, so anything under 60-70% at idle or light use is nothing to worry about.
Is 70% RAM usage bad?
Not inherently. It’s worth watching if it climbs higher under normal use or causes slowdowns, but 70% during active multitasking (browser tabs, apps open) is common and not a red flag by itself.
Is 16GB of RAM good?
Yes, for most everyday use, browsing, and office work in 2026. It’s tight for heavy multitasking, video editing, or modern gaming at high settings — 32GB is the safer bet if you do any of that regularly.